
How To: Using AnimatedSprited2D node with AnimationPlayer(2D)
This is my first how-to on the blog, so please comment if you like it and want to see more.
*This post expects some basic understanding of how Godot works, and all images of the engine are as of 4.3.
One of the challenges I faced and couldn’t find good material on was using AnimatedSprite2D nodes with the AnimationPlayer. You might be wondering why I would want to use those together in the first place. Here’s my explanation: I find the AnimatedSprite2D node very intuitive in bringing in a spritesheet with the animations and getting it up and running quickly. It also automatically plays at the speed I want without finagling (more on this in the how-to part). However, things like sound or callouts to Signals don’t exist as part of the node, which is where the AnimationPlayer comes in. Using the Sprite node allows for quick setup of the animation itself, and then the Player gives me the rest of the needed flexibility.
How to achieve this:
Create your AnimatedSprite2D and load your animations - there are a ton of videos on this step so I will skip the details here
As a child of the AnimatedSprite2D, add the AnimationPlayer node
Once you have done this, make sure you are on the Animation tab at the bottom and have an empty animation created.
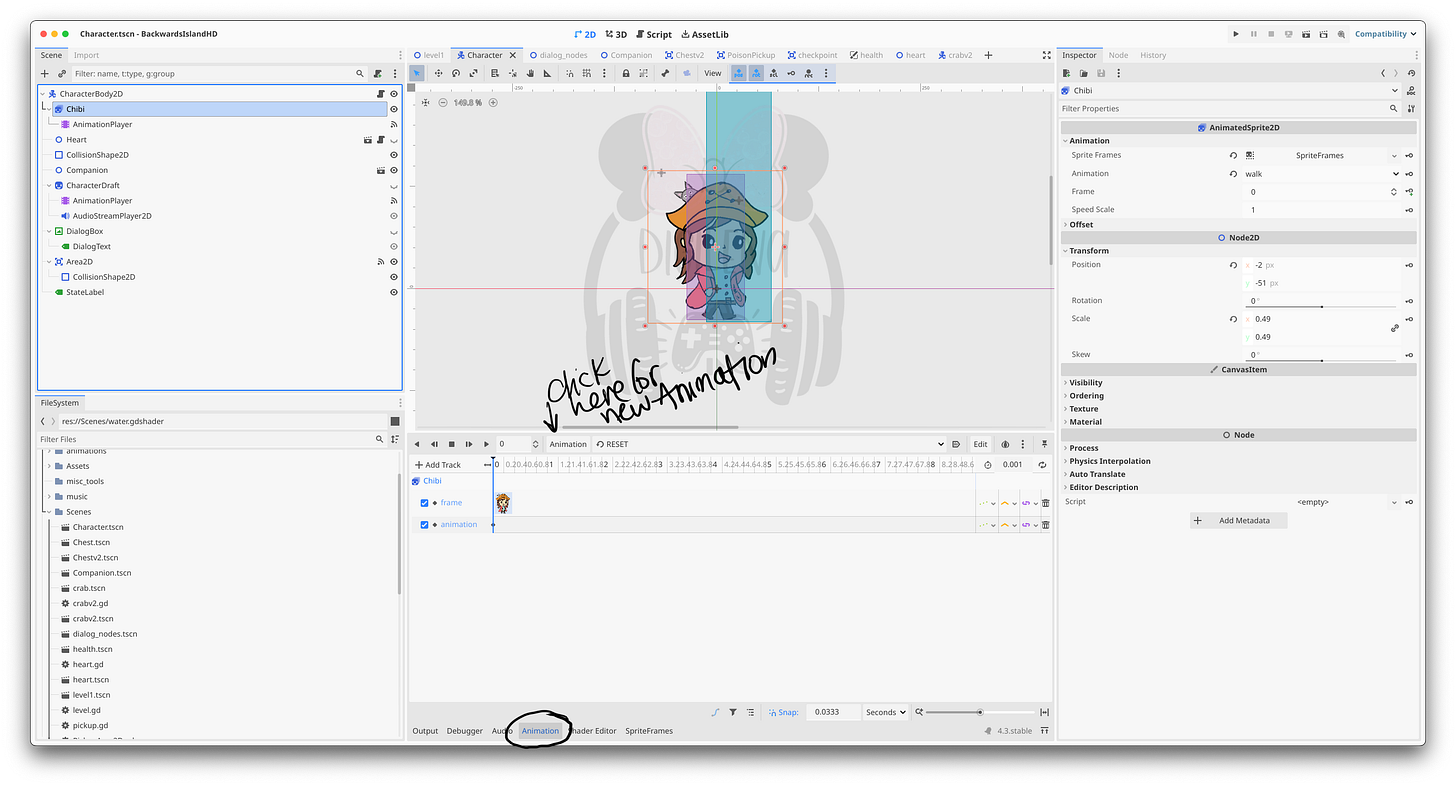
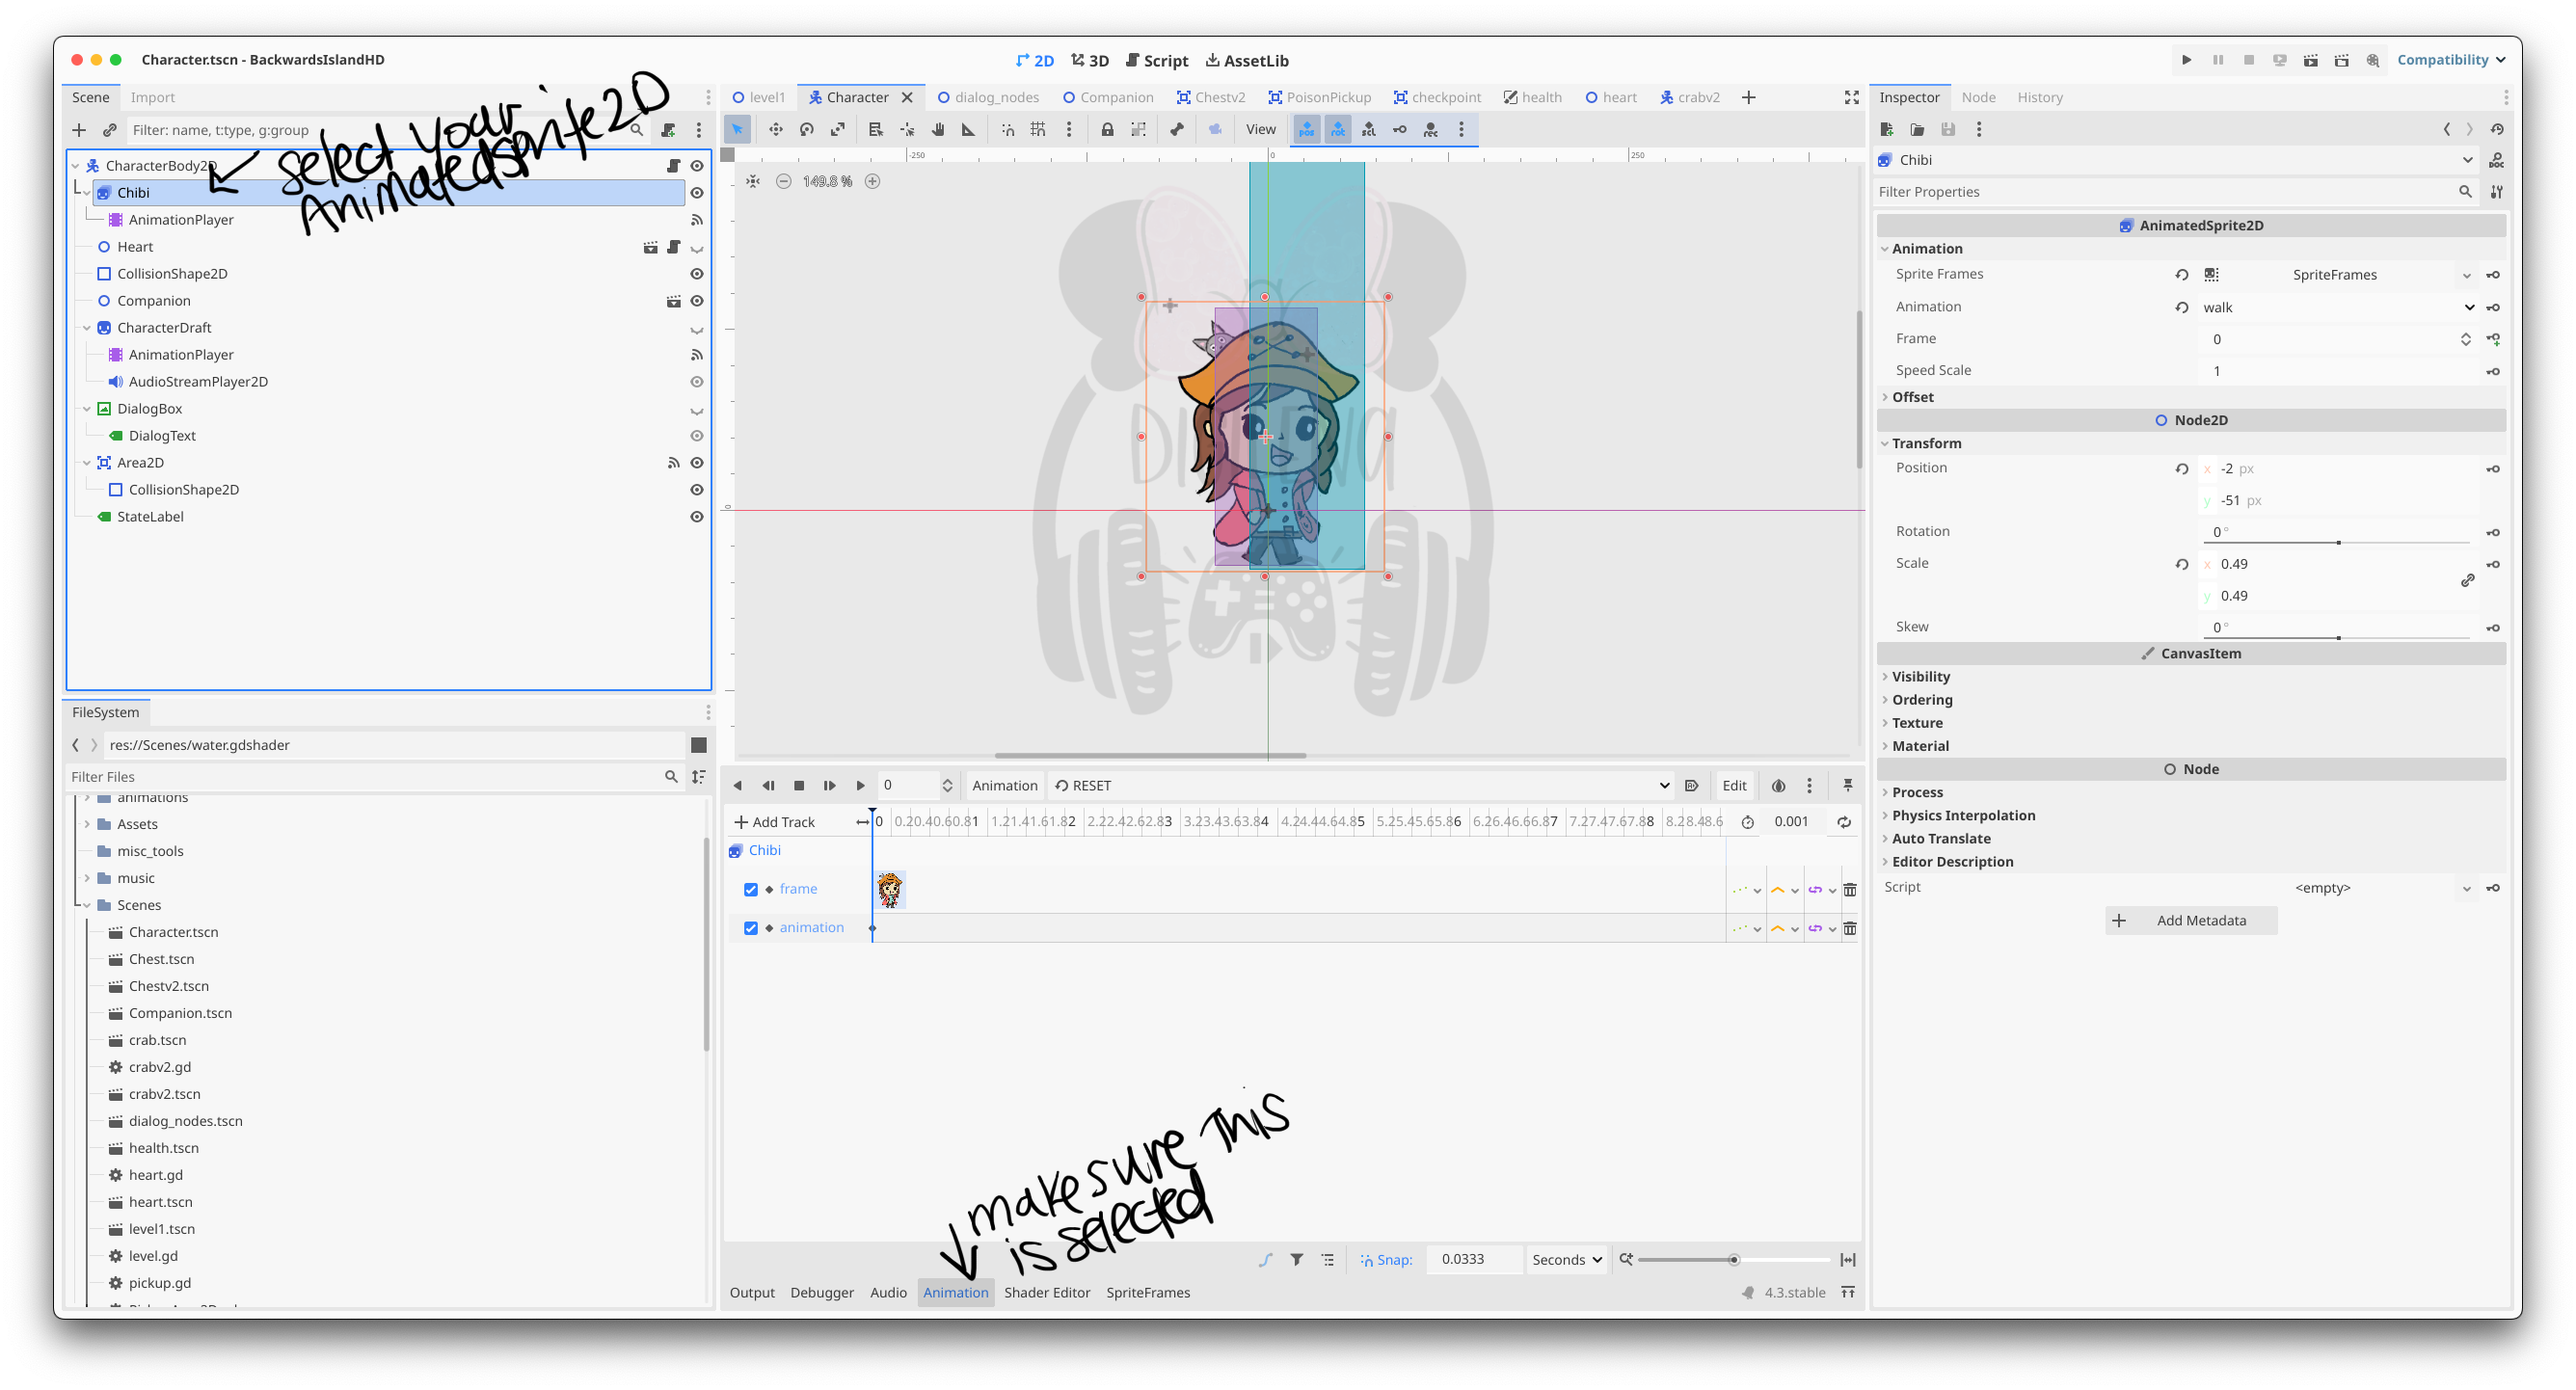
Ensuring you are on the animation tab, click on the AnimatedSprite2D node from the tree. It is possible after doing this, you may have to click on the Animation tab at the bottom again.

Now ensure your Animation at the bottom matches the selected animation in the Inspector. Once done, you will create a new Track by clicking the Key+ icon.

Now, as seen circled in blue above, click the up carrot and then click the key for each frame you have in the animation.
A note: if you have a specific frames-per-second that you want your animation to run, say 12FPS (typical for anime), then before doing step 6, make sure the Snap at the bottom of the screen is set to the correct value you want between each frame. As a general note, .083 seconds is the value for 12FPS. Remember that this is not the 30 or 60 FPS we talk about when a game runs, but rather the speed of the frames for that specific animation.

Lastly, you will want to ensure you create a Track for the Animation itself. You will know you have done this right, as the images should appear in the frame track line.


That’s it! Now, the two behave nicely together, and you can continue adding sounds or any other track you need with the animation.